OCI GenAI and APEX

Introduction
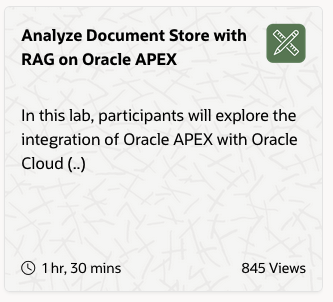
In honor of Joel Kallman, I have been playing with one of the Livelabs from https://livelabs.oracle.com: “Analyze Document store with RAG on Oracle APEX”. These Livelabs give insights, ideas, and open my eyes to what is possible with Oracle technology.
For a DevOps engineer like me, clicking around GUIs to make things work is frustrating. I prefer a GitOps-style approach where I can document different steps, especially when a LiveLab contains several components like the Database, OCI, and APEX. There are so many small details that I would forget without documentation. I want this documentation to be available for future projects and labs.
The challenge: How can I iteratively develop my skills? Automate and make the LiveLab reproducible with code!
The Goal
The goal is to stay in the terminal and install a working APEX application that invokes the OCI GenAI agent service:
- Provision OCI GenAI services
- Create OCI user with correct privileges
- Create APEX workspace
- Import APEX application with correct configuration
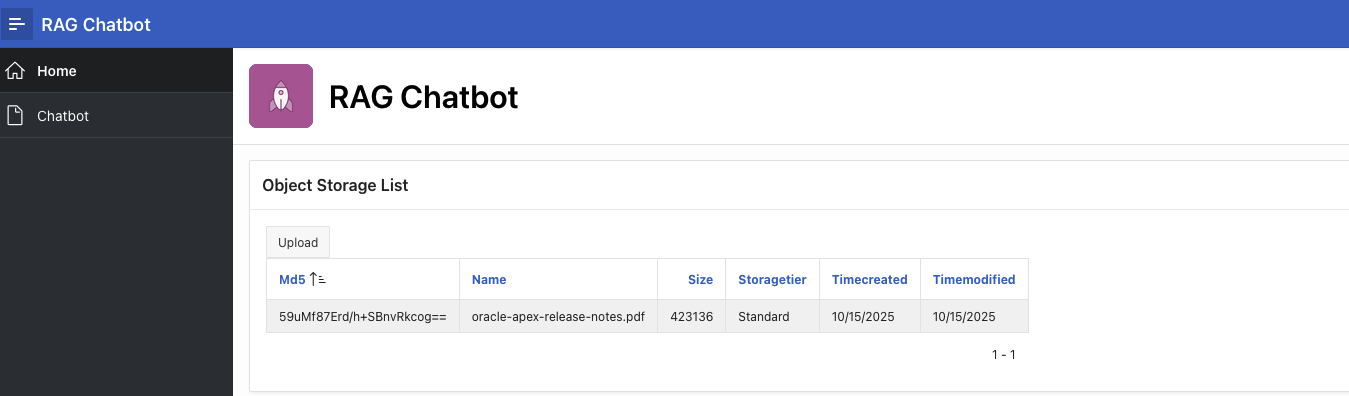
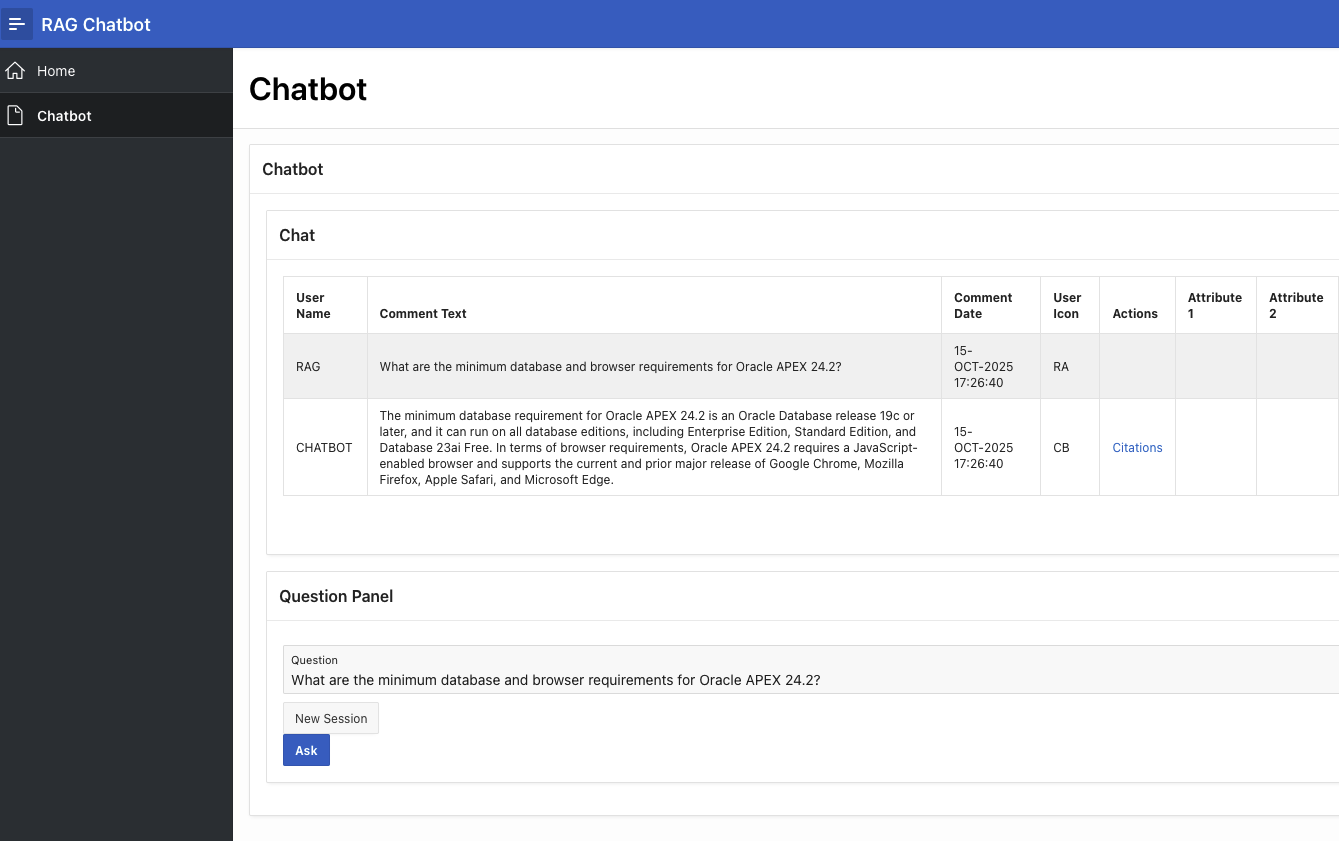
- Run APEX application and utilize RAG functionality on files in object storage
Prerequisites
- OCI Tenant (pay-as-you-go, though Always Free services work for most components)
oci-cliconfigured on macOS with compartment ID (C) and tenancy ID (T) set- Always Free Autonomous Database (ADB) already provisioned
- SQLcl with JavaScript support and connmgr configured with named credentials
- Shell: macOS ZSH with OhMyZsh
- Editors: NeoVim/LazyVim, Claude Code, Cursor, Windsurf
- CLI tools: gemini-cli, GitHub Copilot, Ghostty terminal
Section 1: OCI Configuration for the LiveLab
Provision OCI GenAI Services
First, set up your project directory and source your environment variables:
mkdir oci-genai-and-apex
cd oci-genai-and-apex
git init
. ./env.sh # contains AGENT_* and BUCKET_NAME variables

printenv | grep -E 'AGENT_|BUCKET_NAME'
Create the storage bucket and provision OCI services:
# Create the bucket (one-time operation)
oci os bucket create -c $C --name "${BUCKET_NAME}" --versioning "Disabled"
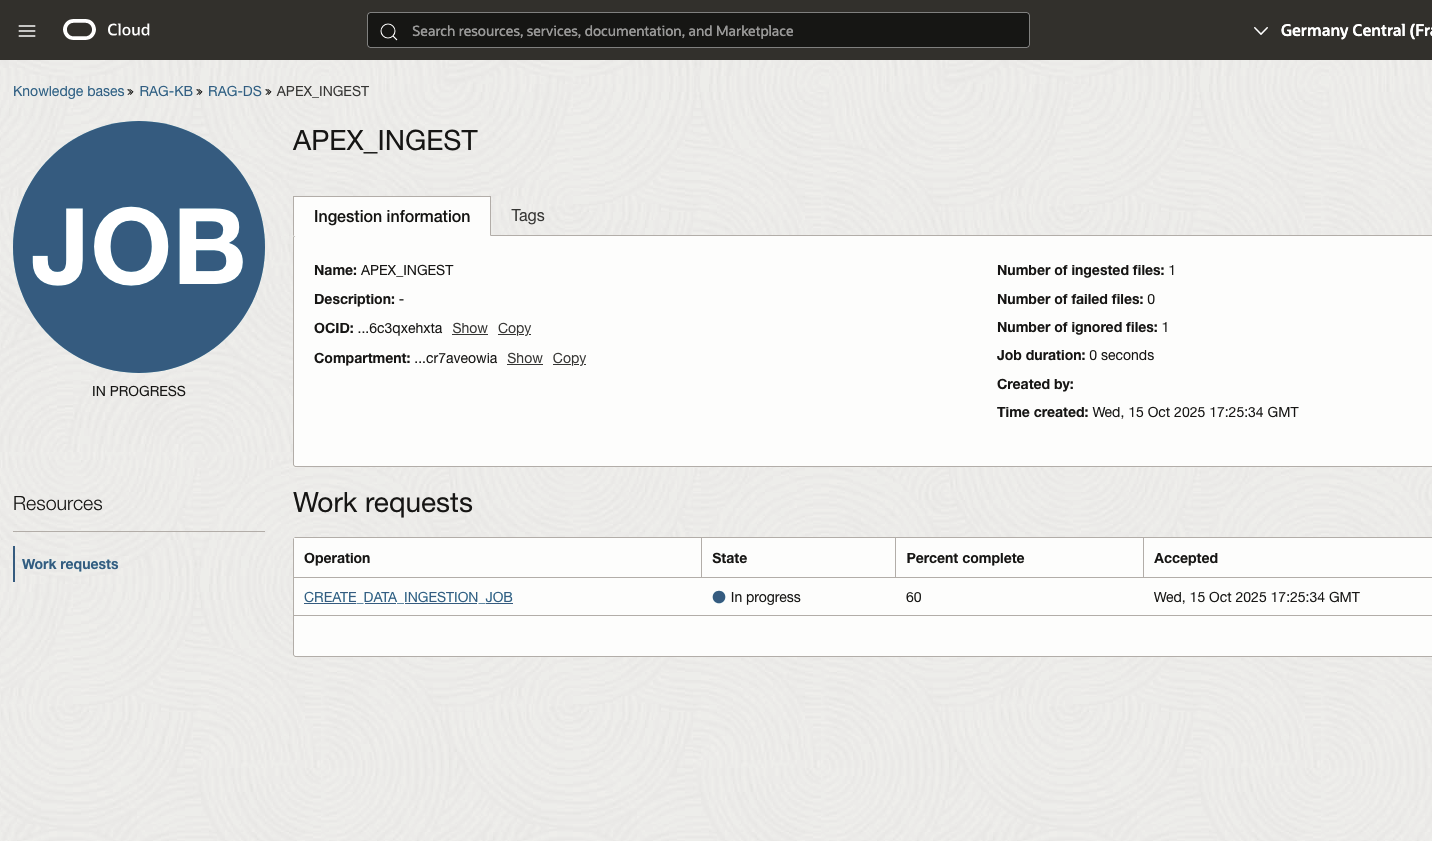
# Provision OCI GenAI services with install script
./install.shThe installation script creates:
- Knowledge Base - Stores your RAG (Retrieval-Augmented Generation) knowledge
- Data Source - Connected to your object storage bucket
- AI Agent - The GenAI service instance
- Agent Endpoint - REST endpoint for the agent
- RAG Tool - Tool that enables RAG functionality
The output shows completion status:
=== Installation Summary ===
🎉 Installation completed successfully!

Resource Summary:
  📦 Total resources: 5
  ✨ Newly created: 5
  ♻️  Already existing: 0

Created Resources:
  🧠 Knowledge Base: RAG-KB
  📚 Data Source: RAG-DS
  🤖 AI Agent: RAG-Agent
  🔗 Agent Endpoint: RAG-Agent-Endpoint
  🔧 RAG Tool: RAGLL
Create OCI User with Correct Privileges
Create IAM groups and policies for proper access control:
# Create storage admin group
STORAGE_ADMIN_GROUP_NAME=apex-storage-admin-group
oci iam group create \
  --compartment-id "${T}" \
  --name "${STORAGE_ADMIN_GROUP_NAME}" \
  --description "Group for admin of APEX storage"

# Create storage policy
oci iam policy create \
  --name "apex-storage-admin-policy" \
  --compartment-id "${C}" \
  --statements "file://apex-storage-admin-policy.json"

# Create GenAI admin group
GENAI_ADMIN_GROUP_NAME=apex-genai-admin-group
oci iam group create \
  --compartment-id "${T}" \
  --name "${GENAI_ADMIN_GROUP_NAME}" \
  --description "Group for admin of APEX generative AI"

# Create GenAI policy
oci iam policy create \
  --name "apex-genai-admin-policy" \
  --compartment-id "${C}" \
  --statements "file://apex-genai-admin-policy.json"
Create the API user:
# Create API user
USER_NAME="apex-genai-agent-user"
USER_OCID=$(oci iam user create --description "APEX Storage and GenAI Admin User" \
  --name "${USER_NAME}" --query data.id --raw-output)

# Set user capabilities (API key only)
oci iam user update-user-capabilities \
  --user-id "$USER_OCID" \
  --can-use-api-keys true \
  --can-use-auth-tokens false \
  --can-use-console-password false \
  --can-use-customer-secret-keys false \
  --can-use-db-credentials false \
  --can-use-o-auth2-client-credentials false \
  --can-use-smtp-credentials false

# Add user to both groups
STORAGE_ADMIN_GROUP_OCID=$(oci iam group list \
  --query "data[?\"name\" == \`$STORAGE_ADMIN_GROUP_NAME\`] | [0].id" --raw-output)
oci iam group add-user --group-id="${STORAGE_ADMIN_GROUP_OCID}" --user-id="${USER_OCID}"

GENAI_ADMIN_GROUP_OCID=$(oci iam group list \
  --query "data[?\"name\" == \`$GENAI_ADMIN_GROUP_NAME\`] | [0].id" --raw-output)
oci iam group add-user --group-id="${GENAI_ADMIN_GROUP_OCID}" --user-id="${USER_OCID}"

# Generate API keys
openssl genrsa -out ~/.oci/oci_api_key_${USER_NAME}.pem 2048
chmod go-rwx ~/.oci/oci_api_key_${USER_NAME}.pem
openssl rsa -pubout -in ~/.oci/oci_api_key_${USER_NAME}.pem \
  -out ~/.oci/oci_api_key_${USER_NAME}_public.pem

# Upload public key
oci iam user api-key upload --user-id "${USER_OCID}" \
  --key-file ~/.oci/oci_api_key_${USER_NAME}_public.pem
Section 2: APEX Configuration
Let’s move into APEX land. The APEX app needs to communicate with object storage (REST) and the GenAI agent (REST).
Create APEX Workspace
Using SQLcl, create the APEX workspace:
sql -nolog

idle> cm list
# View your named connections

idle> conn -name admin@ADB01
# Connect as ADMIN to your ADB

ADMIN@ADB01> @create-apex-workspace.sql
# Creates workspace and RAG schema
Verify workspace creation:
ADMIN@ADB01> @apex_workspaces.sql

WORKSPACE_NAME             SCHEMA
__________________________ ___________
COM.ORACLE.APEX.REPOSITORY APEX_240200
COM.ORACLE.CUST.REPOSITORY APEX_240200
INTERNAL                   APEX_240200
RAG                        WKSP_RAG

4 rows selected.
Install APEX Application with Web Credentials
Use environment variable substitution to configure the application:
#!/bin/bash
# configure.sh

export USER_NAME="apex-genai-agent-user"
export TENANCY_OCID=$T
export COMPARTMENT_OCID=$C
export BUCKET_URL=$BUCKET_URL_SECRET
export WEB_CREDENTIAL="api_key"

export AGENT_ENDPOINT_OCID=$(oci generative-ai-agent agent-endpoint list \
  --compartment-id $C --all \
  --query "data.items[?contains(\"display-name\", \`${1:-$AGENT_ENDPOINT_NAME}\`) && contains(\"lifecycle-state\", \`ACTIVE\`)]| [0].id" \
  --raw-output)

export AGENT_DATA_SOURCE_OCID=$(oci generative-ai-agent data-source list \
  --compartment-id $C --all \
  --query "data.items[?contains(\"display-name\", \`${1:-$AGENT_DATA_SOURCE_NAME}\`) && contains(\"lifecycle-state\", \`ACTIVE\`)]| [0].id" \
  --raw-output)

export AGENT_URL="https://agent.generativeai.eu-frankfurt-1.oci.oraclecloud.com"
export AGENT_RUNTIME_URL="https://agent-runtime.generativeai.eu-frankfurt-1.oci.oraclecloud.com"
export USER_OCID=$(oci iam user list --query "data[?\"name\" == \`$USER_NAME\`] | [0].id" --raw-output)
export OCI_FINGERPRINT=$(oci iam user api-key list --user-id $USER_OCID \
  --query 'data[] | [0] .fingerprint' --raw-output)
export PRIVATE_KEY_PEM=$(cat ~/.oci/oci_api_key_apex-genai-agent-user.pem)

# Perform substitutions
envsubst <create-web-credential.template.sql >create-web-credential.sql
envsubst <f100.template.sql >f100.sql
Create the web credential in APEX:
ADMIN@ADB01> @create-web-credential.sql
PL/SQL procedure successfully completed.

-- Verify credential
ADMIN@ADB01> @apex_workspace_credentials.sql

WORKSPACE NAME    STATIC_ID CREDENTIAL_TYPE
_________ _______ _________ ___________________________
RAG       api_key api_key   Oracle Cloud Infrastructure

1 row selected.
Connect as the APEX schema and import the application:
idle> conn -name admin[wksp_rag]@ADB01
WKSP_RAG@ADB01> @apex_set_sec_group_id.sql
PL/SQL procedure successfully completed.

WKSP_RAG@ADB01> @f100.sql
-- Application import runs...
-- elapsed: 12.37 sec
...done
Launch and Test the Application
Open APEX in your browser:
open $(oci db autonomous-database get --autonomous-database-id="${1:-$DB_OCID}" \
  --query 'data."connection-urls"."apex-url"' --raw-output)
Login with:
- Workspace: RAG
- Username: RAG
- Password: (your configured password)
What I Learned
Breaking down complex problems into manageable pieces is crucial:
- GenAI services setup
- APEX workspace configuration
- Web credential management
- Application installation
When all pieces come together, everything works. Using Git for version control allows you to:
- Break from your project for weeks/months and resume seamlessly
- Tear down all components and start fresh at any time
- Maintain reproducibility and idempotency
- Follow the DevOps Way
Code Repository
Full source code available at: https://github.com/bjarteb/oci-genai-and-apex
The key takeaway: Automation + Documentation = Skill Development